Have you ever encountered a situation when you were ready to wrap your present with the perfect wrapping paper but were unable to do so? Why? Because the gift you wanted to wrap is oddly shaped and can’t be wrapped with the wrapping paper. At that time, one quick and life-saving thing you can do is to make a bag out of wrapping paper. And we bet you that if you are a creative person, you would have definitely hit this idea. But you might be unsure of how to make a bag out of wrapping paper.
In this blog, we are going to learn the process of making a bag out of wrapping paper. Without wasting a single minute, let’s get started!
Why Making Your Own Wrapping Bag Is Better Than Purchasing?
At the time of special events like Christmas, Easter, Halloween, birthdays, anniverseries, or any other, everyone is looking for gift bags or gift packaging. Imagine the ready-made gift bags run out at that time. Would you not give gifts to your loved ones because you were unable to arrange the bags? No! At such a time, making your own bag out of wrapping paper saves you from embarrassment and disappointment. Besides this, you get the following benefits:
Cost Effective
When you have to send hundreds of gifts to your loved ones, friends, and family, you need bags in bulk. They can cost you to break your bank. If you purchase wrapping paper in bulk, you can make hundreds of bags at half the price of the ready-made bags. A single roll of wrapping paper is enough for making multiple bags, which saves a lot of cost.
Perfect-Sized Bags For Gifts
The store-bought bags are designed for traditional gifts and come in standard sizes. If you need a bag for oddly shaped items, these bags might not be suitable. Making your own bag lets you customize the perfect-sized bags for your gifts, whether they are tall, small, or oddly shaped.
Saves Your Life At The Last Moment
When you have bought gifts but forgot to purchase the bags, making bags out of wrapping paper can save your life. Instead of rushing towards the market at the last moment, when there may be a possibility of gift packaging running out.
Customization and Personalized Feel
The ready-made or store-bought bags lack a personalized feel and do not give you a margin for customization. With one wrapping paper, you can create a coordinated theme for all gift bags that store-bought bags will not offer. You can choose wrapping papers in different patterns and prints for a more personalized feel.
What Items and Accessories Will You Need To Make A Bag?
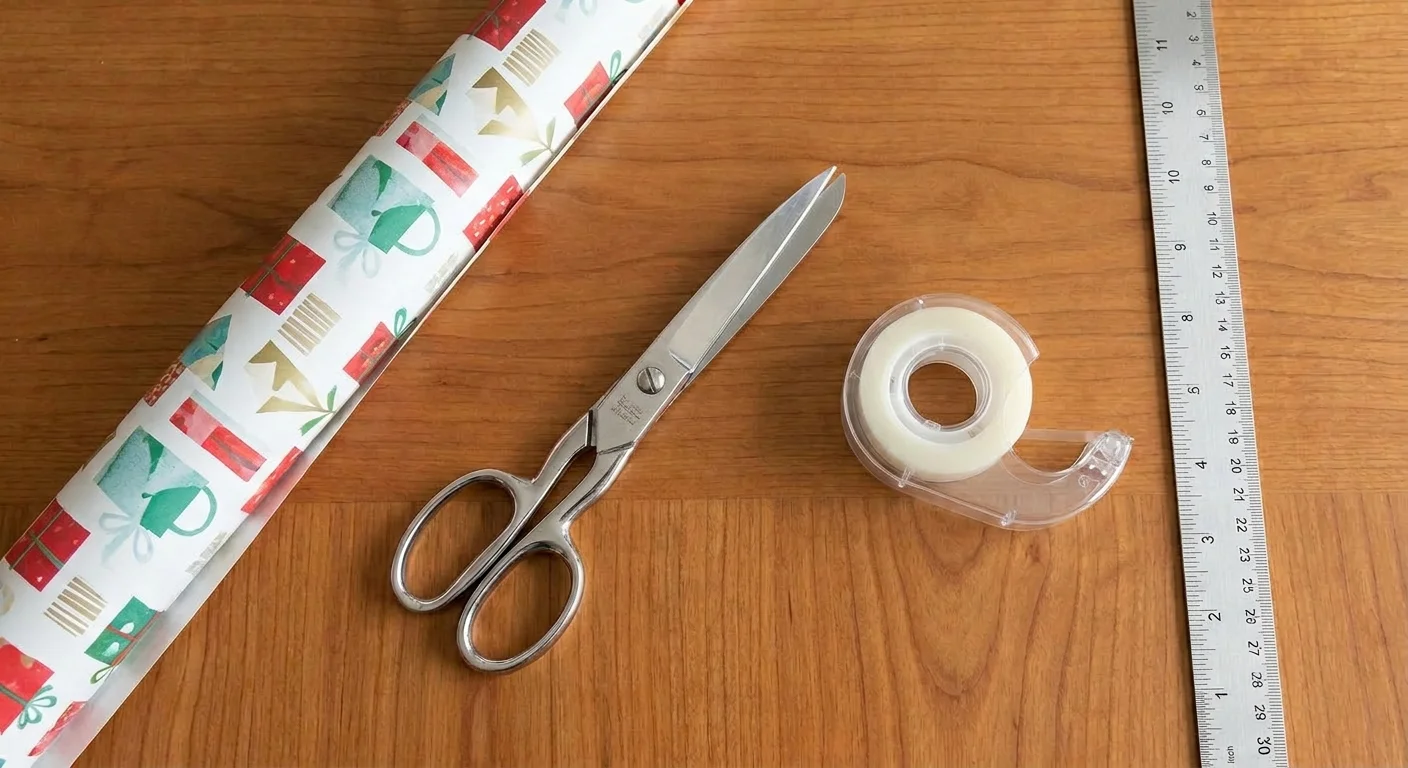
Before you start making a bag, it’s better to gather the items and accessories needed. The best thing about this DIY wrapping paper bag is that you will find most of the items at home. And the other items are easily available at the nearby stores. Gear up by gathering all the following items before sitting to transform the wrapping paper into an attractive bag:
| Materials & Tools For Gift Bag Making | ||
|---|---|---|
| Item/Accessory | Use | Specifications/Notes |
| Durable Wrapping Papers | For making the bag | MyBoxPrinting's Recommended |
| Scissors | To cut the wrapping paper | — |
| Ruler | To measure the paper according to the length, width, and height of items | — |
| Tape | To secure the ends, creases, and folded paper | — |
| Glue Stick | Can be used in place of tape | — |
| Cellophane Wrap For Windows | This is optional and used if you want to add windows to the bag | Optional |
| Hole Punch | To create holes for handles and hangings | Optional |
| Stapler | In case you don't have the tape, you can have the stapler | Optional |
| Ribbon | The ribbons are used as handles | — |

And that’s all you need to make your bag. No fancy items are required.
What Kind Of Wrapping Paper Must Be Used?
When you are going to make bags from the wrapping paper, the material matters a lot. Don’t go for flimsy and thin types of paper. We recommend that you choose sturdy wrapping paper so that it provides better support, does not tear, and holds its shape better, even for heavyweight items.
In addition to the wrapping paper, you can also use some additional materials. The materials include cardboard for supporting the base, decorative tissues for filling the gap, and cushioning.
8 Quick Steps To Make Your Wrapping Paper Bag
Making a bag from wrapping paper is not a hard nut to crack. You don’t need fancy items. You just need to perform the steps carefully, and it will take only 10 minutes for your bag to be finished. Carefully perform the following steps:
1). Collect Your Supplies
2). Measure (how much wrapping paper you require)
3). Cut The Paper
4). Fold The Paper To The Center
5). Fold The Bottom
6). Open The Bag and Put The Item In The Bag
7). Create Two Holes For Ribbons At The Bag Top
8). Add The Gift Card With Ribbon
In the next section, we are going to learn in detail how to perform each step efficiently. Just follow the instructions given below, and you will get the best results.
Step By Step Explanation Of How To Make A Bag Out Of Wrapping Paper
In the above section, we just had an overview of the quick steps you need to perform if you want to transform your wrapping paper into a bag. You need to start by gathering all the supplies and the gift item to be wrapped. Start by positioning the wrapping paper on a flat surface in such a way that the decorative side faces down. Now, you can start performing the following steps carefully to get a high-quality gift paper bag out of wrapping paper:
Grab Your Supplies
Before you sit down to wrap your gift, you must have all your accessories near you. Make sure from wrapping paper to scissors and tapes, you have each supply in your reach. Otherwise, you will have to go again to find the accessories that will create unnecessary delays.
Measure How Much Wrapping Paper You Need
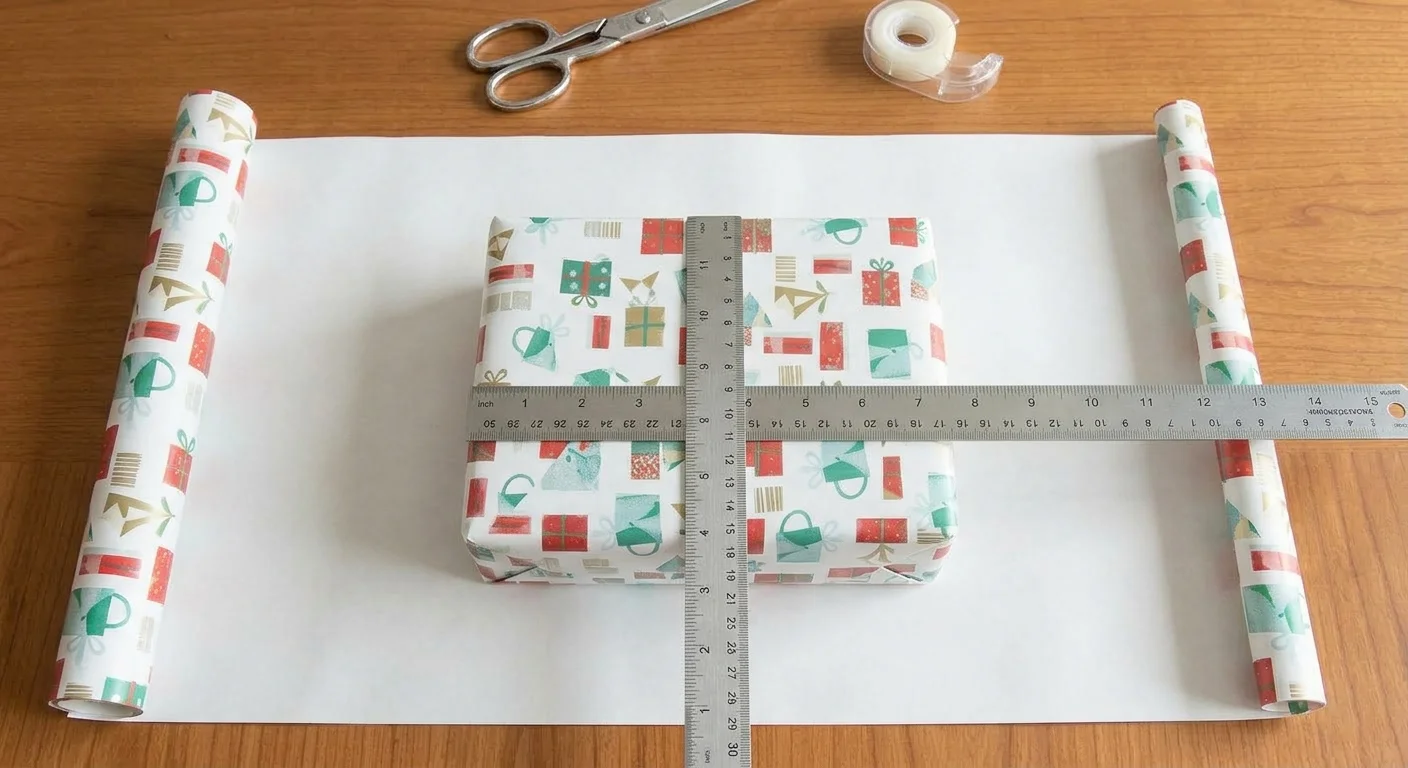
Spread the wrapping paper with the decorative side facing down on a flat surface. Place the gift item onto the paper and measure the gift’s height, width, and depth accurately. Add 4 to 6 inches to the height so that the paper can be folded at the top. To ensure that your bag is wide enough to hold the gift, you must add 2 to 3 inches to the width when overlapped.
The length must be measured in such a way that it covers the height and has enough paper to be folded at the top.
Cut The Paper

When you are going to start cutting the paper after accurate measurements, make sure it lies on a flat surface. This prevents irregular cuts. Moreover, don’t be stingy with paper, as extra paper will help you to adjust to any mishappening or ease of folding. It is always better to have extra paper instead of running out of it. Before cutting, check the measurements again with the help of a ruler. After this, you can fold the paper in half.
Fold The Paper To The Center
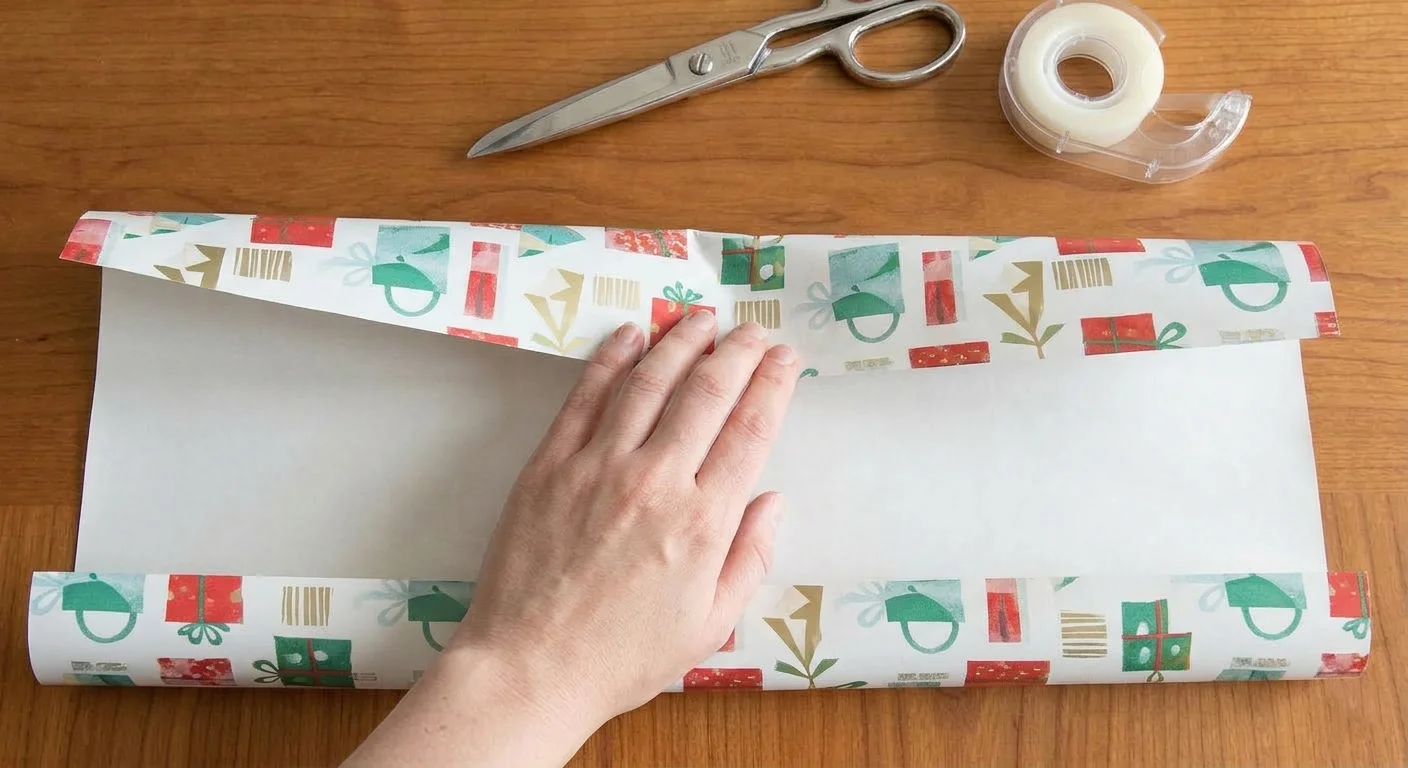
After cutting the paper, it’s time to fold the paper to the center from both sides. The paper must be folded in such a way that it overlaps the middle of the page by a couple of inches.
Check The Paper Size
Before you crease the paper, you must check if the paper size can accommodate the product or not. Place the item on the folded paper and make sure there is one inch extra on both sides of the item. This helps you to figure out whether the oddly shaped items will fit the bag or not.
Crease The Paper
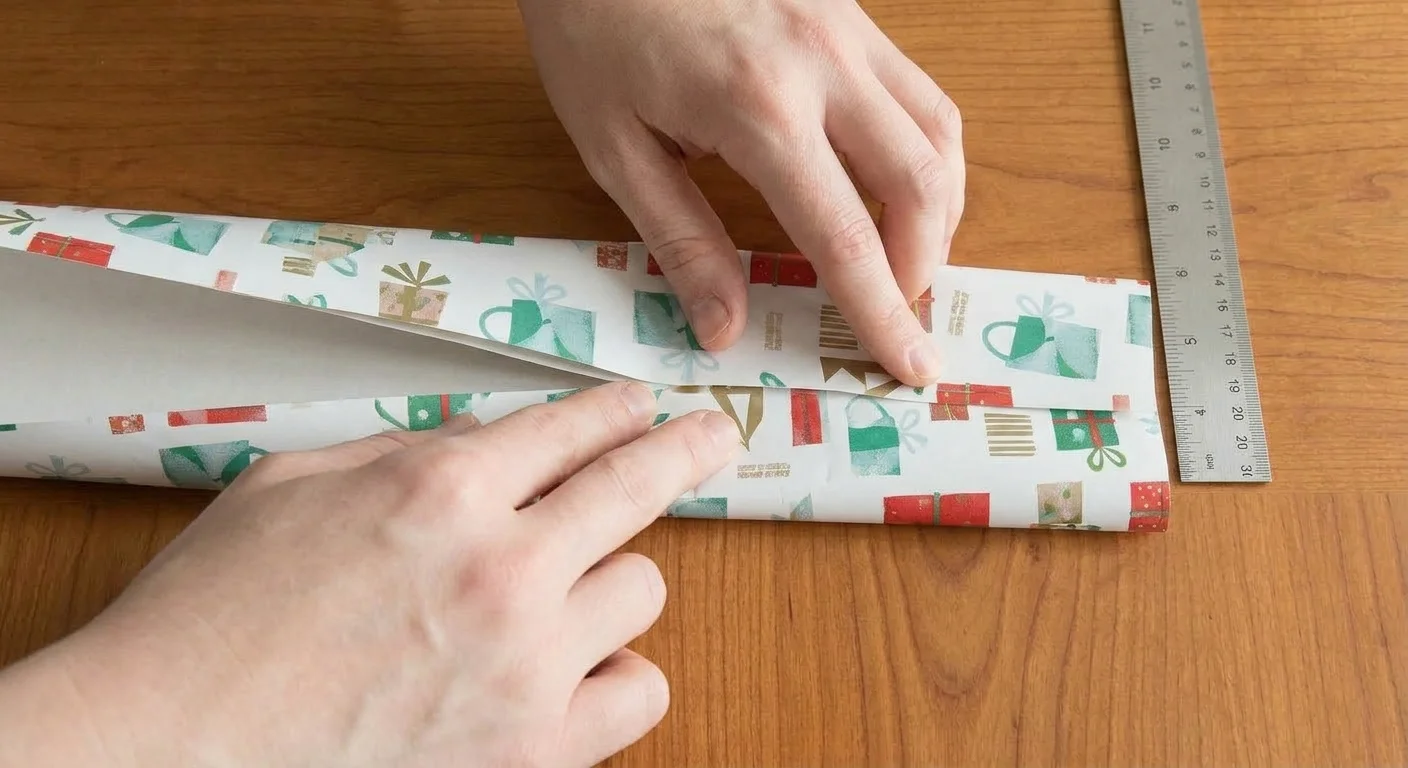
Once you are sure that the size is correct, press the edges of the paper down to create a crease on both sides.
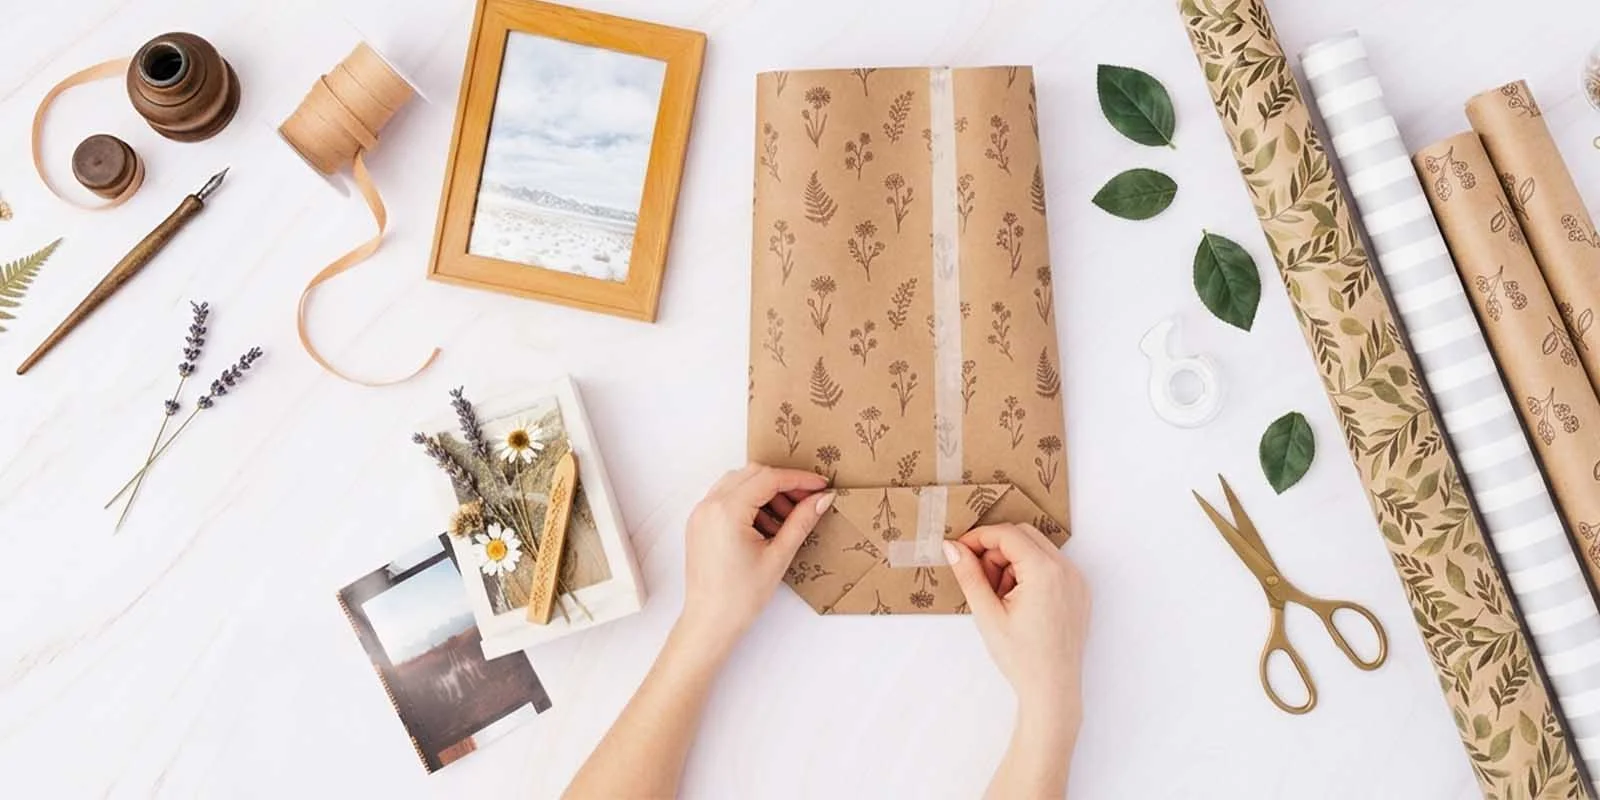
Tape
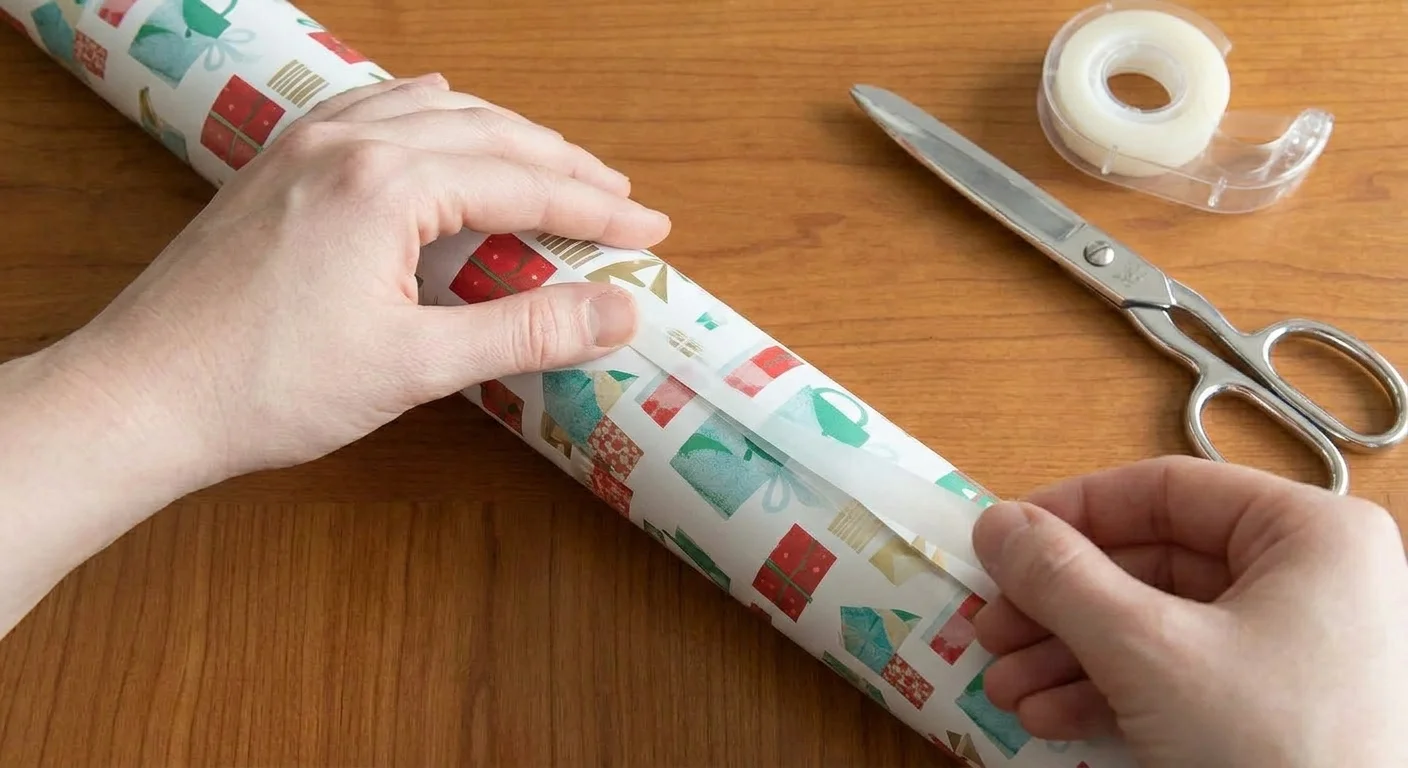
After creating the perfect crease, it’s time to secure the middle overlapping paper using a piece of tape. This will give a secure and crisp finish to your bag.
Pro Tape Tip:
Do not let anyone get a sneak peek of your enclosed gift item by taping down the entire middle of the paper. This ensures the secrecy of your gift and offers a protective bag for it.
Form The Base Of Bag By Folding The Bottom
The base of the bag is very important as it is the place that will hold your item securely in the bag. So, it must be carefully formed. To form a wider base, fold the bottom as high as possible. Fold the left, right, top, and bottom edges of the bottom side and seal with tape. For this, follow these steps:
Fold The Bottom Up
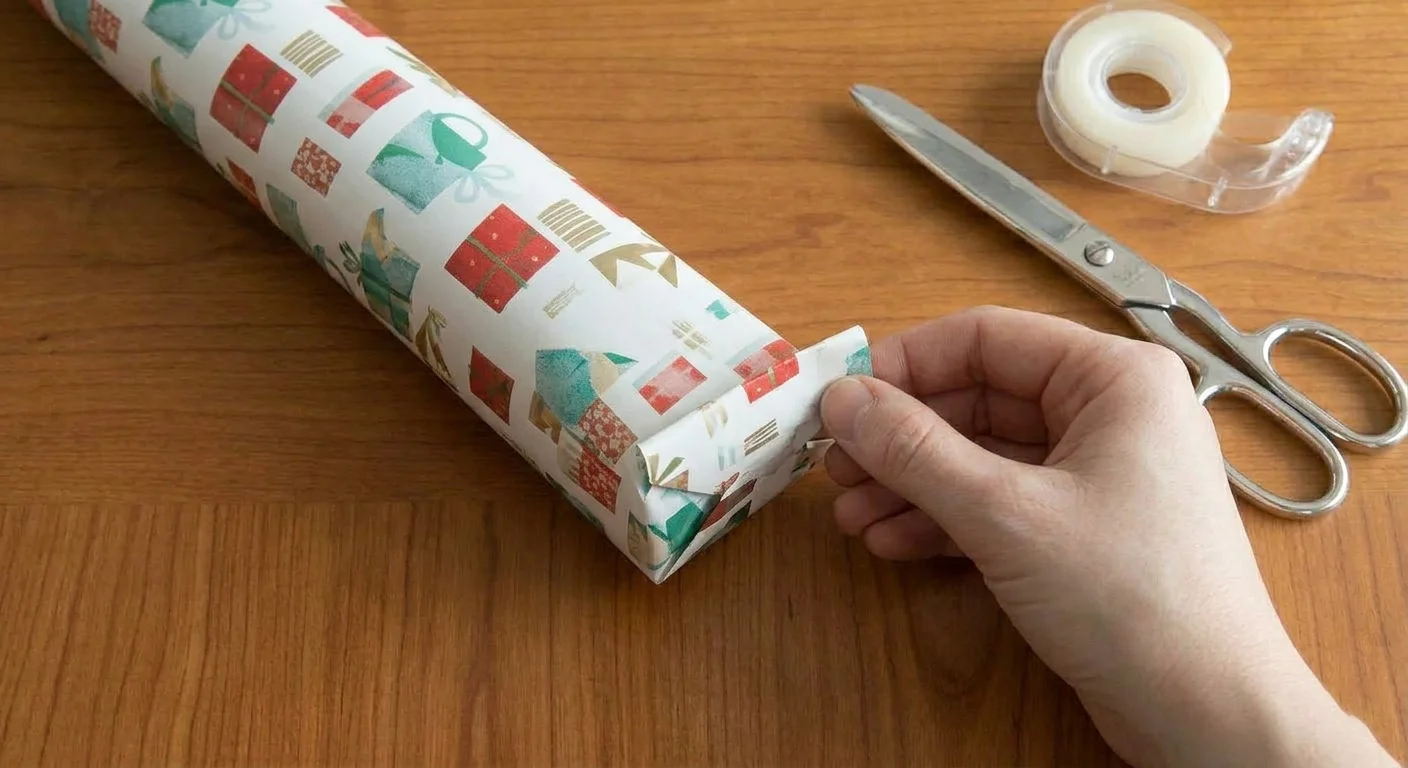
You have to take the bottom edge of the wrapping paper. Now fold it 1/4 of the way up the total bag length and create a crease by pressing along the edge.
Fold The End Into A Diamond Shape
Once you have created a crease, you can now make the paper stand from the folded side vertically. It’s time to convert the folded end into a diamond shape. For this, just slowly press the top and bottom corners towards the middle. This will convert the folded side into a diamond base that we wanted to form. Create the creases and let the paper lie flat on the surface.
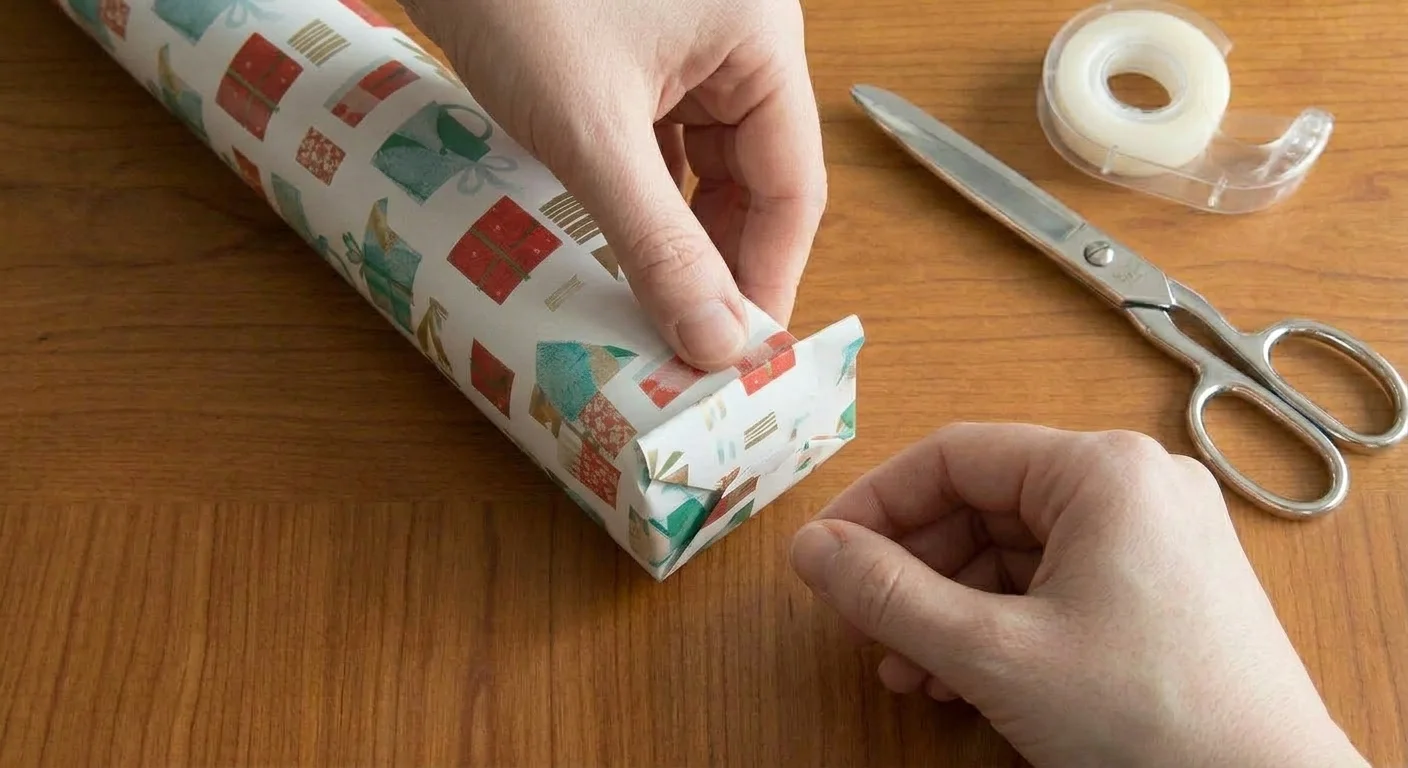
Fold The Top and Bottom Corners
After converting into a diamond shape, find the top and bottom corners of the diamond shape side. Fold the top and bottom corners towards the center of the diamond, just like closing an envelope.
Tape
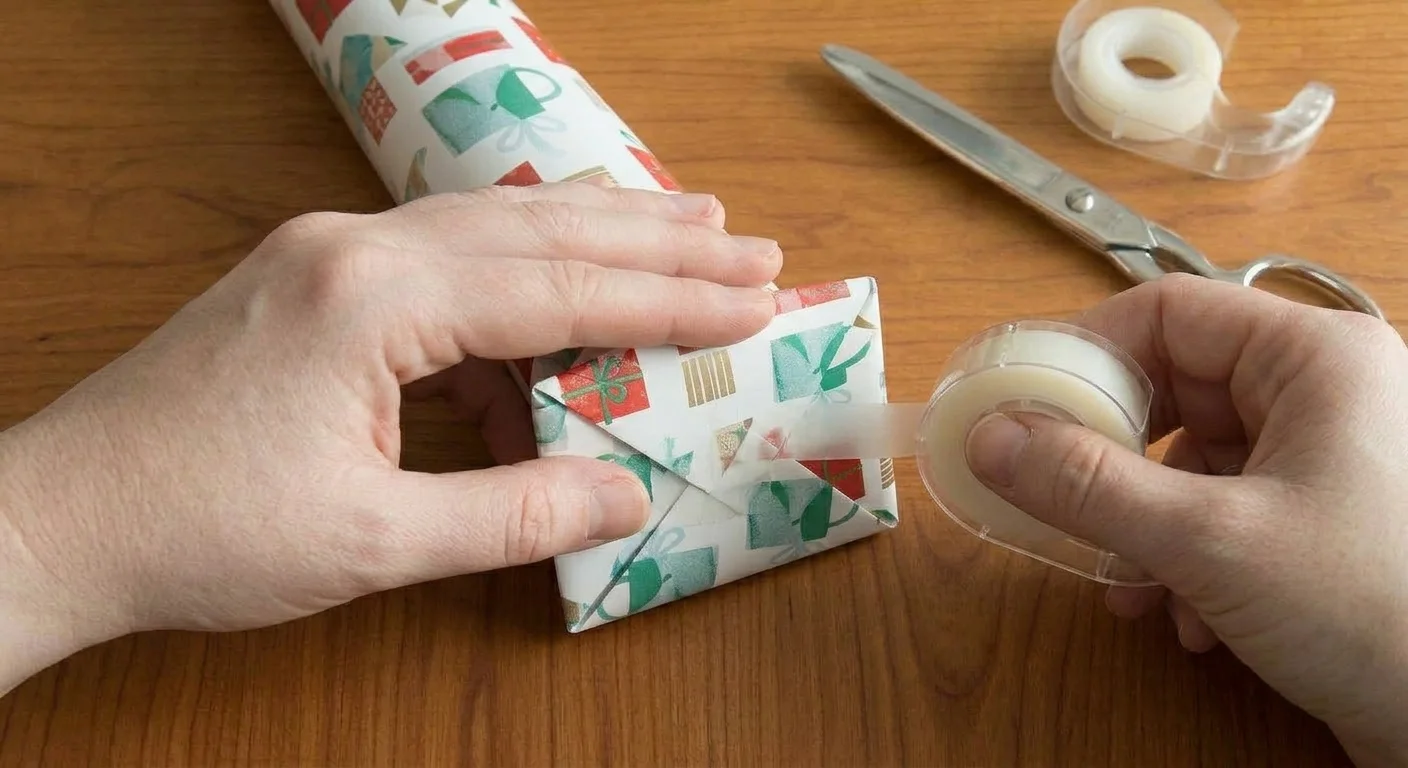
Now, to make the base strong, the final step is to seal it properly with tape. Secure the corners with tape to form a strong base for your bag.
Pro Taping Tip For Base:
As the base must be strong, it’s recommended to use 4 to 5 pieces of tape on the base. This will ensure your gift item remains safe in the gift bag and does not cause the base to tear through.
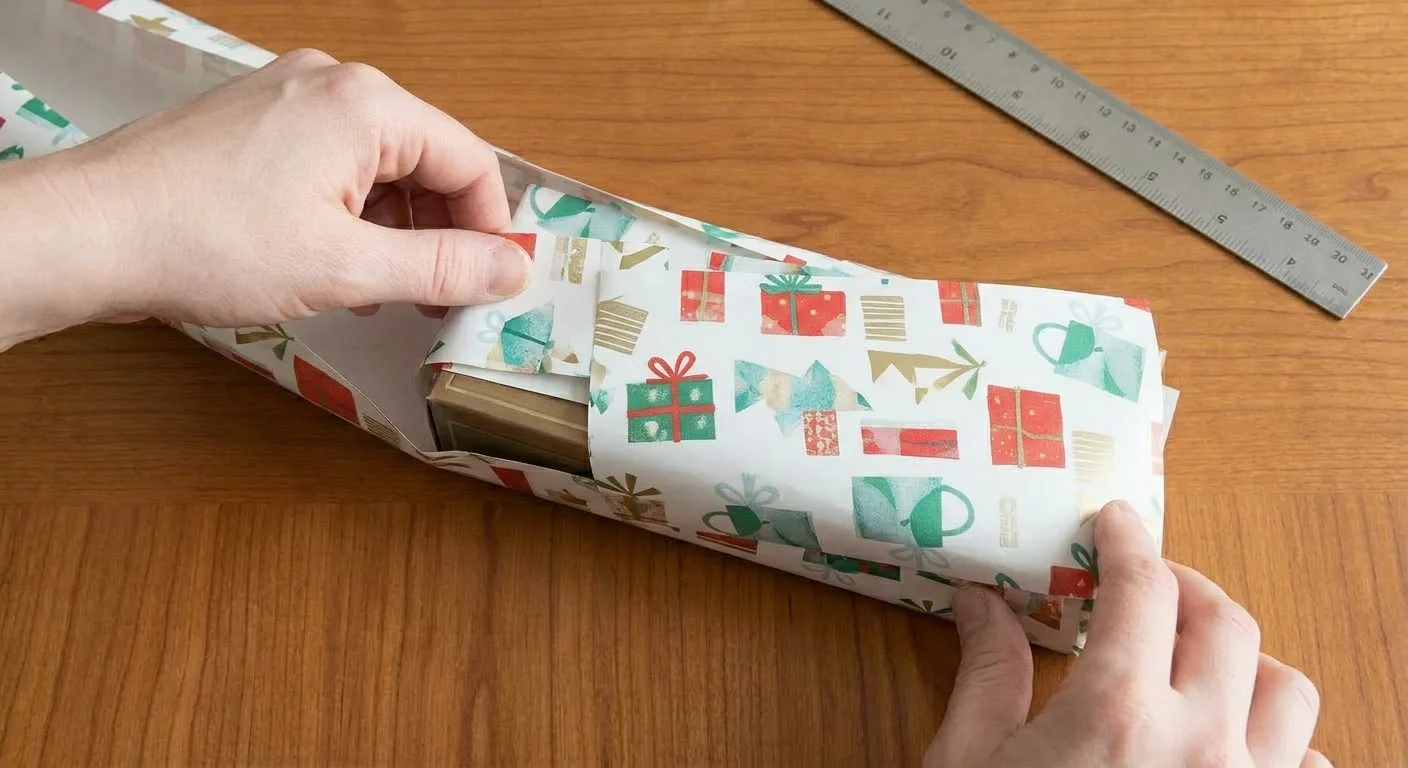
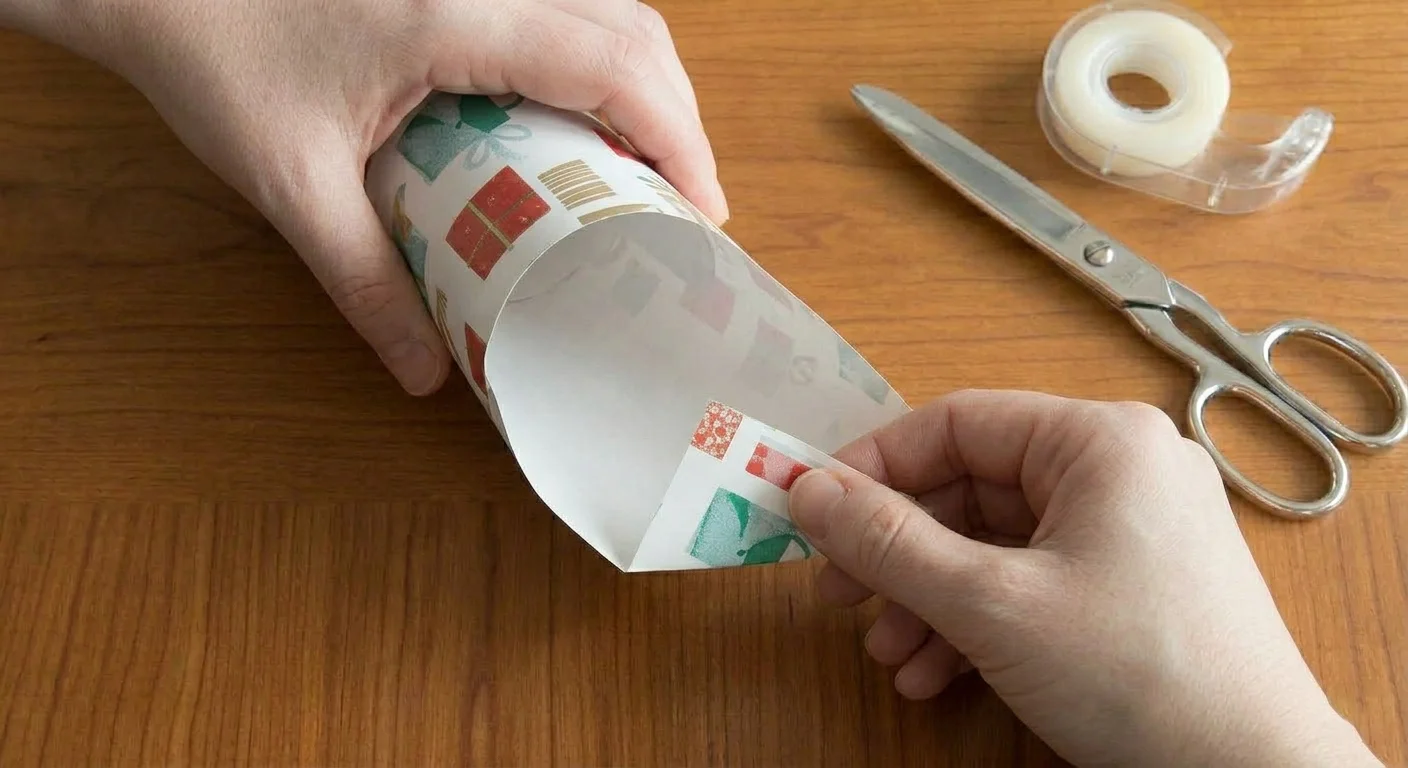
Open The Bag and Insert The Gift Inside
Now the base is ready, which was a major and crucial task. Now you can open the bag and place the item to check if it fits your gift or not. Slide the item carefully so that it does not rip the wrapping paper.
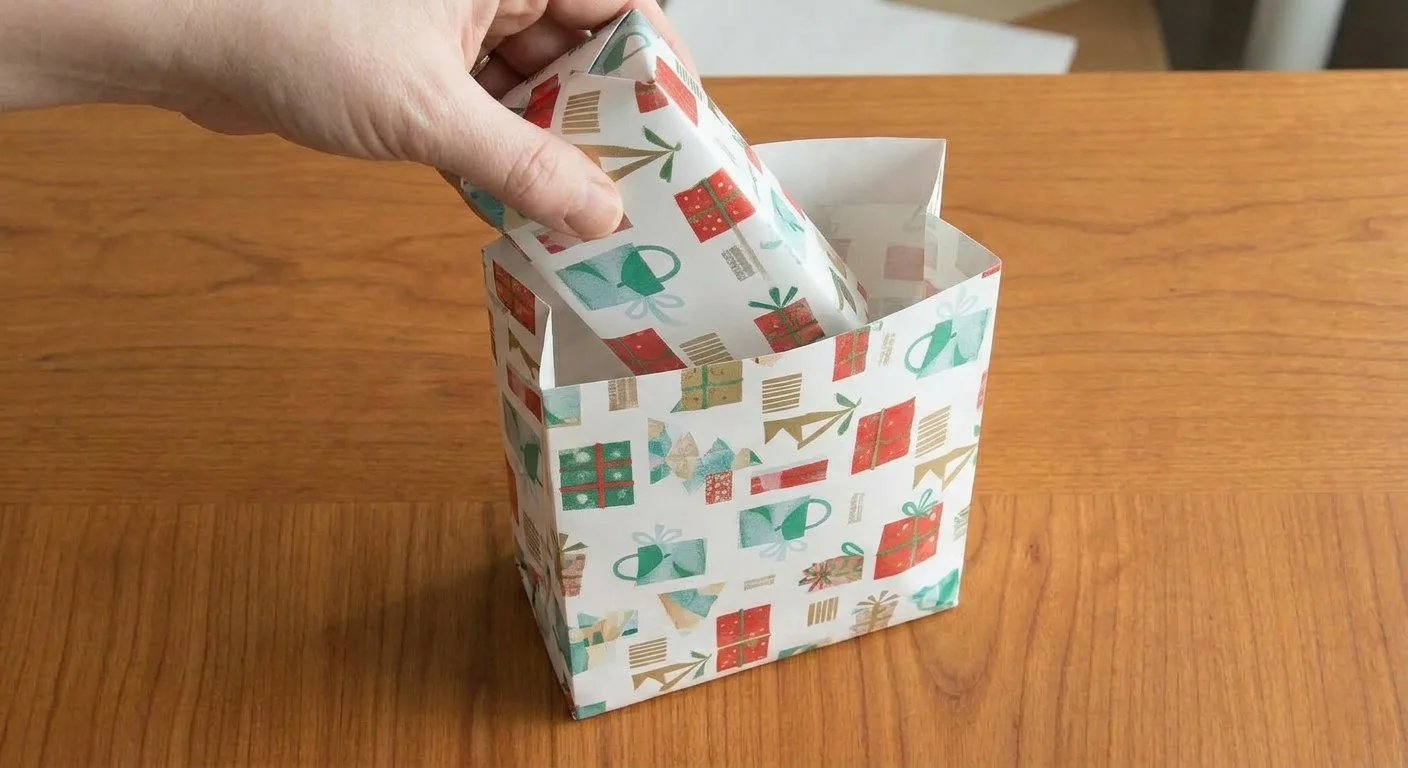
If the bag is oversized, that’s not a problem. You will just need to cut a few inches from the top. If you are placing a fragile item like a photo frame, you can add cotton balls to ensure a cushioning effect.
Create Holes On The Bag Top
Once you have ensured the right size bag for holding your item, you can now finish the bags with handles. Before you create holes for the handles, follow the given steps for a perfect output:
Crease Both Sides
While your product is in the bag, you can slowly press both sides of the wrapping paper, starting from the top. This will crease both sides.
Fold The Top Of The Paper Towards The Item
Bring the top edge of the paper down and fold it downward so that it can lie flat against the paper. You have to fold according to the extra paper you have. You can fold one or two more times to create a perfect-sized top of the bag.
Either Tape Or Staple The Folded Paper
Now, to close the bag, you can either tape or staple the folded paper. The tape will secure the folded paper, and your wrapping paper is now fully converted into a bag without handles.
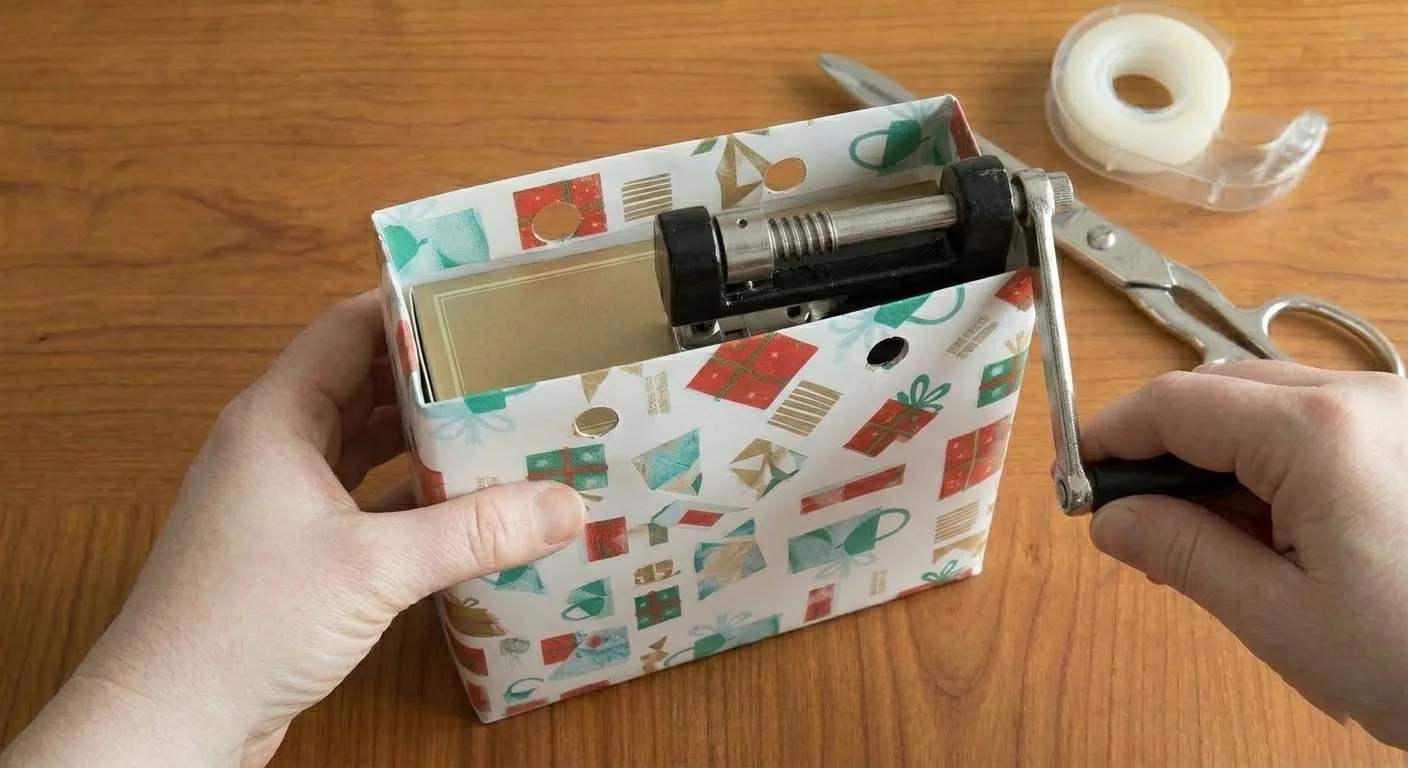
Create Two Holes With The Help Of A Hole Punch Or Scissors
If you want a bag with handles that offers ease of carrying and enhances the bag's look, you can add ribbon handles or cards. For this, you need to create two holes with a hole punch. Leave a 2-inch space at the top and make the holes.
Add The Gift Card With Ribbon
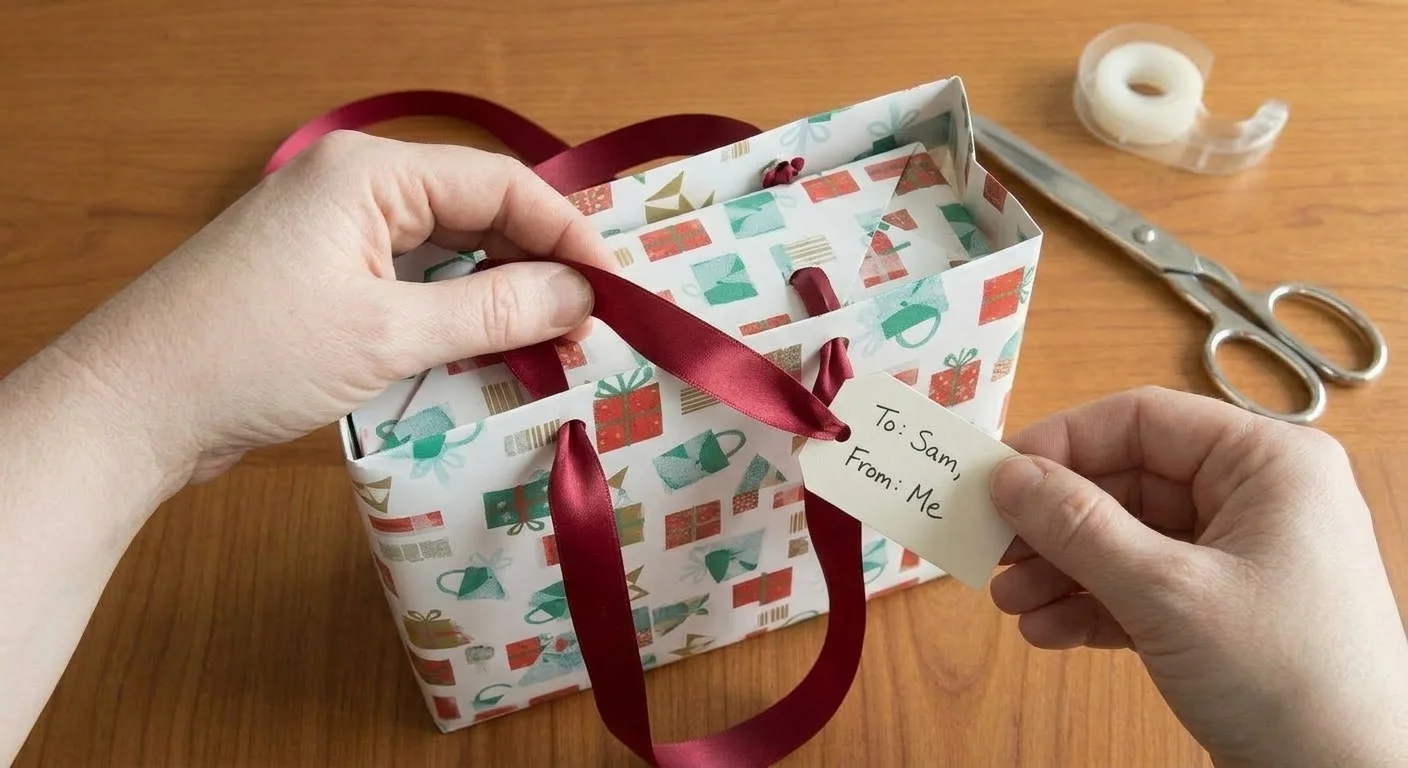
Pass the piece of ribbon through both holes. Now you can insert the card tag or handwritten notes through the ribbon to elevate the presentation and add a more personalized effect. Tie the ribbon into a bow for a perfect finish, and that’s all! Your bag is ready now.
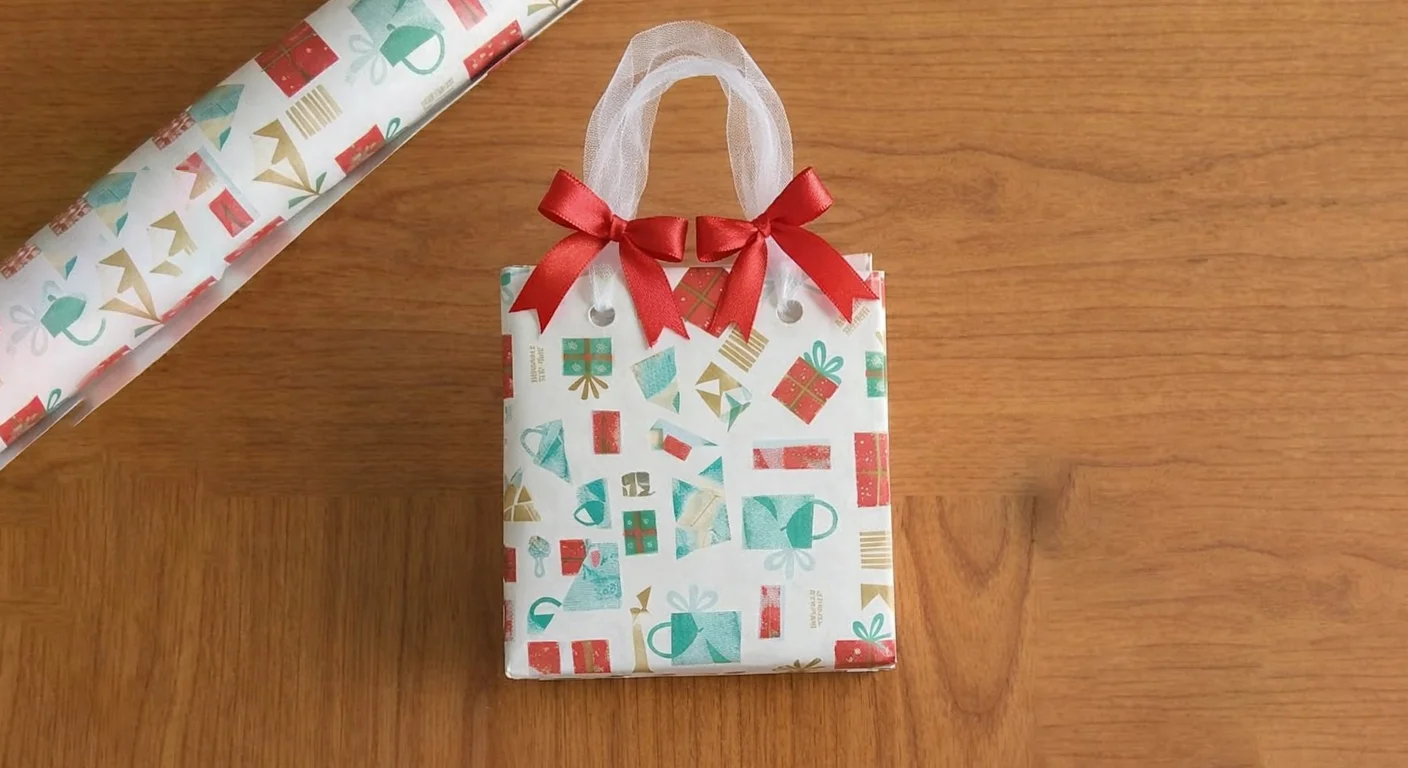
Pro Tip For A Perfect Finish:
If you want a perfect bow for your gift bag, you must take a ribbon double the height of the gift.
Make Your Paper Bags More Appealing With Customization
Above, we just learned about how to create a bag out of wrapping paper. But if you want to create a visually appealing bag that impresses the recipient, customization will make this happen for you. You can enhance the visual appeal of your bags with the following customization options:
Add Colorful Ribbons
Instead of plain ribbons, choose the printed ribbons to enhance the look of your personalized bags. You can also create colorful ribbons by painting them in appropriate colors. You can also choose the contrasting colors for a more aesthetic look.
Add Stickers and Decals
Whether you want to gift an adult or a kid, add stickers or decals, as they both love them. If you have people obsessed with die-cut stickers, then their gift bag deserves to be decorated with stickers and decals. They will be happy and put your stickers everywhere, from their Stanley to their laptops.
Add Handwritten Notes For Personalization
Personalized gifts always make a difference. You can personalize your bags with handwritten notes that are more effective than any readymade bows or embellishments. Write your best wishes on the cards and hang them by passing through the ribbon.
Use Colorful Pom-Poms
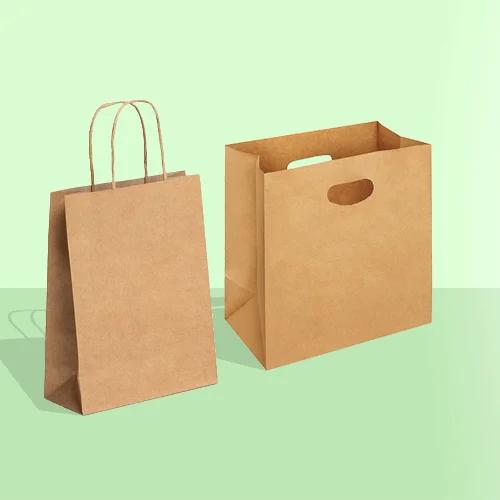
Using a brown paper bag and don’t want to compromise on its earth-friendly aesthetics? Why not you use colorful pom poms? They will transform your boring brown or monochrome bags into something vibrant and eye-catching. These pom poms can help you create different shapes or just curved lines to improve the presentation.
Make A Name Tag
You can add name tags if you want to achieve practicality without compromising personalization. With a single name tag, you will enjoy two benefits: gift identification and personalization. For events like Christmas or Easter, when your surroundings are flooded with many gifts, the name tag will help you identify each gift separately. The other benefits are that the gift looks more elegant. It gives a more personalized feel and makes the recipient happy with a visually appealing appearance.
You can either stick alphabet name cards or create your own cards with names. You can craft them in your own version.
Incorporate Windows In Your Bags
Windows are an interactive and fun element you can add to your bags. For adding windows, you will need an additional item, i.e., a cellophane wrap. Cut the rectangle of your bag from the front side, wrap it with the cellophane wrap, and tape it. Your gift bag with a window is ready, which will give a sneak peek at the inside product.
Add Layers For A Dimensional Effect
A unique thing that can differentiate your gift bag from others is that you can add a dimensional effect. Attach a contrasting paper panel to the bag’s front before you assemble the wrapping paper. This dimensional space is for your personalized messages and decorative items to turn it into an attractive bag.
Try Accordion Style Tops With Folded Paper Handles
You can also style accordion-style tops for the bags that contain extendable gussets, which can be folded back and forth. It resembles the folding bellows of an accordion musical instrument, which is why this top is called an accordion-style top. You can experiment with folded paper strips.
Non-Traditional Gathered Style Closure
Instead of using ribbon or fabric for the handles, you can try something non-traditional. Gather the paper like fabric and tie it with a ribbon. This will create a soft look and will be noticeable among several gift bags.
No matter what style you choose from the above, they are easy to make and will definitely impress the recipient. In the presence of a hundred gifts packed in ready-made bags, your personalized gift bag will steal the attention.
How To Make Bags From Wrapping Papers For Different Items?
Not all gifts are of the same shape and size. Some gifts are easily wrapped using the traditional wrapping paper, while the oddly shaped gifts need special treatment. Every gift is unique, so every gift deserves special treatment. Let’s learn how you can wrap gifts of different shapes, natures, and sizes:
Odd Shaped Gifts
When you have purchased an oddly shaped gift, be prepared to understand that the traditional wrapping will not work for it. But there is good news for you that they can be handled properly with the gift bags.
To make bags for these objects, you need to measure the widest dimensions from all sides properly. Allow extra space in the interior because the oddly shaped items require more space than the rectangular-shaped objects. The bags made from flexible wrapping papers conform to the shape of the gift better than the rigid box packaging.
Mini and Small Gifts
When you are to gift someone small and mini gift items such as jewelry or gift cards, nothing is more adorable than mini gift bags. For small bags, don’t go for heavyweight materials. Instead, choose the lightweight materials because they work well with small dimensions. These gift options look more appealing to customers, who love, save, and reuse them as keepsakes.
Large or Heavy Items
You have chosen a heavyweight gift item, so choose a heavy-duty material for packaging. For bulky objects, the paper bags will not be a suitable option. You must go for cardboard boxes that can easily withstand the bulky weight and protect them during shipping and transit.
Anyhow, if you don’t want a box, simply stick the cardboard material to the bottom of the heavy wrapping paper bag. This distributes the weight equally. Your bag's bottom will be safe from tearing through. Place the items carefully so that they do not stress the weak points.
Tall and Narrow Gifts
Want to pack tall and narrow gifts like bottles, candles, and other items? If so, you need to understand that you will need to create a bag with wider dimensions to prevent top-heavy tipping. The bag must have adequate space at the top of the bag to accommodate the height of the object. But don’t use extra paper because it will be just a waste of paper. Just fold the paper enough to accommodate the height.
Whether you are going to make a bag for small gifts, tall items, oddly shaped items, or large, bulky items, bags will be designed differently. For odd-shaped gifts and tall gifts, you need to make bags with wider dimensions. For small gifts, you need to choose lightweight wrapping paper so that small dimensions can be accommodated. So for different gift items, you need different bags.
Common Mistakes To Avoid When Making A Wrapping Paper Bag
Making a bag out of wrapping paper is a brilliant idea if you get the perfect outcome. It’s one of the most cost-effective and life-saving ideas when you need gift bags in bulk. But there are some common mistakes that can increase cost and labor instead of savings. Avoid the following mistakes while making the paper bags:
Choosing a thin and low-quality wrapping paper that neither supports nor holds its shape
Being stingy on the tape by applying insufficient tape at the stress points, especially the base
Incorrect measurements that waste material or run out of material
Being hasty in creating folds and creases gives an unprofessional look to bags
Key Tips For Best Results
You can get the best results for your paper bags if you follow some key tips. These key tips will make sure you don’t get into trouble while making the paper bags. The following tips will help you create a perfect bag for your precious gifts:
Choose Quality Wrapping Paper
When you have to make a paper bag, always go for sturdy wrapping paper. It must be strong enough to support weight and maintain its shape. The thin wrapping paper bought from a dollar store will not be worth it, as it will tear off. Purchase quality wrapping paper from trusted providers.
Watch Pattern Direction Before Folding
If you have chosen a wrapping paper that has a specific pattern, observe the direction of the pattern first. Decide in which direction you want the pattern on your bag. Before folding, make sure the pattern is in the direction you want.
Make The Base Stronger With Cardboard
The base is the bottom of the bag where you are going to place your gifts, so it must be sturdy enough to bear weight. You can make the base stronger by pasting the cardboard material on the base. Now, you can place your gifts without any fear of your bag tearing off.
Use Light Handles
If you are going to place lightweight items into your paper bag, it is recommended to use lightweight tulle, ribbon, or paper handles. The heavy materials can tear the paper. When you are placing heavyweight items, do not add handles. You can design a gathered style top and use ribbon as an embellishment.

Make Several Bags For Gifts Of The Same Size
When you have gifts of the same size, it’s better to create multiple gift bags of the same size. It will save you time, cost, and extra labor.
Where To Find Durable and Quality Wrapping Paper and Similar Materials?
No doubt, making bags out of wrapping paper is a creative and cost-effective idea. But the whole effort will fail if the wrapping paper you used is not of good quality. If you have chosen a quality wrapping paper that is durable and attractive at the same time, your efforts will pay off. Whether you want plain wrapping paper, printed wrapping paper, or custom-printed wrapping paper, MyBoxPrinting is here.
MyBoxPrinting offers you custom packaging solutions at wholesale rates lower than the market without compromising on the materials quality. You can enjoy bulk discounts if you order wrapping paper in bulk quantities. Whether you want wrapping paper or other printing materials, we can provide you with all of them with free shipping all over the USA.
Frequently Asked Questions
Why do you need to make wrapping paper bags instead of purchasing store-bought bags?
Instead of purchasing store-bought bags, making bags out of wrapping paper lets you give you margin for customization. You can design them in any size according to your gift item. You can design your bag in your own way according to the size of your gift item. Moreover, it can save you a lot of cost as multiple paper bags can be made from a single roll of wrapping paper.
What type of wrapping paper should you use?
The wrapping paper you should use must be durable enough to withstand weight. It must not be too thin because it can cause the bag to tear whenever you place an item. The material must maintain the shape and support the weight of items.
Why are the handles of the paper bags always light?
The handles of the paper bags are always light because the heavy materials can tear the bag due to their weight. For lightweight items, paper bags with handles are used. For heavyweight items, handles are not recommended. Instead of handles, tulle or ribbons are used as a decorative item.
What are some customization options for paper bags?
You can customize the appearance of paper bags using different decor elements. Colorful ribbons, pom poms, stickers, and decals can be added. In addition, you can add layers for a three-dimensional effect. Anyhow, you can choose plain or custom printed wrapping papers on the theme of different events.
Can I get custom-printed wrapping paper for different holiday themes?
Yes, you can get custom-printed wrapping paper for different holiday themes. To get them, contact a reliable provider such as MyBoxPrinting. Whether you want wrapping paper for Christmas, Easter, Halloween, or Thanksgiving, you can get wrapping paper for all at wholesale rates.
Wrap Up: Practice Makes A Man Perfect
Making a bag out of wrapping paper seems like a wonderful idea, but you might consider it complicated until you make it. But once you make the bag, you wonder how easy it was to create a bag, and you’re thinking you can’t. Next time, if you run short of time for purchasing the bags, you can simply make your bags at home in just 10 minutes.
It is not mandatory that you get the best results at first time as everyone makes mistakes. In this blog, we learned step-by-step how to make a bag out of wrapping paper. You can practice making bags because practice makes perfect. This holiday season, give your own paper bags a try and save costs. You will not have to compromise on the joy of gift-giving.